
A Windows PC can accumulate temporary files, cached data, and other unnecessary files over time. This guide explains how to clean a computer using CMD in Windows 11/10 to free up disk space and maintain system performance.
Quick Answer
You can clean a Windows 11/10 PC using Command Prompt (CMD). For example, use cleanmgr to remove junk files, and run del %temp%\*.* /s /q to delete temporary files. Or run diskpart clean to erase an entire disk or use defrag to optimize your drive.
When Should You Clean Computer Using CMD
If you are an advanced user, Command Prompt is a useful tool for performing tasks such as system repair, disk management, and advanced network configuration.
In terms of hard drive management, disk cleanup is a critical task. It is recommended to run CMD commands to clean a PC when experiencing the following cases:
- Your disk space is almost full due to accumulated temporary files and junk files.
- The PC is running slowly due to fragmented files and low system resources.
- You want a quick cleanup without installing tools.
CMD Commands for Cleaning and Maintaining Windows 11/10
Use these built-in CMD commands to remove unnecessary files, clear caches, and perform basic Windows maintenance.
Check the table below for a quick overview:
| Command | Main Purpose |
| cleanmgr | Remove unnecessary files |
| del %temp%\*.* /s /q | Delete temporary files |
| del C:\Windows\prefetch\*.*/s/q | Delete prefetch files |
| defrag c: | Optimize the system drive |
| ipconfig /flushdns | Clear the DNS cache |
| DISM /Online /Cleanup-Image /RestoreHealth | Repair the Windows image |
| Diskpart clean | Erase an entire disk |
How to Clean Computer Using CMD Windows 11/10
To clean your PC, run these commands:
- cleanmgr
- del %temp%\*.* /s /q
- del C:\Windows\prefetch\*.*/s/q
Before proceeding, you need to open Command Prompt with admin rights.
Step 1: In Windows 10/11, type cmd into the search box.
Step 2: Click Run as administrator from the popup to open the CMD window.
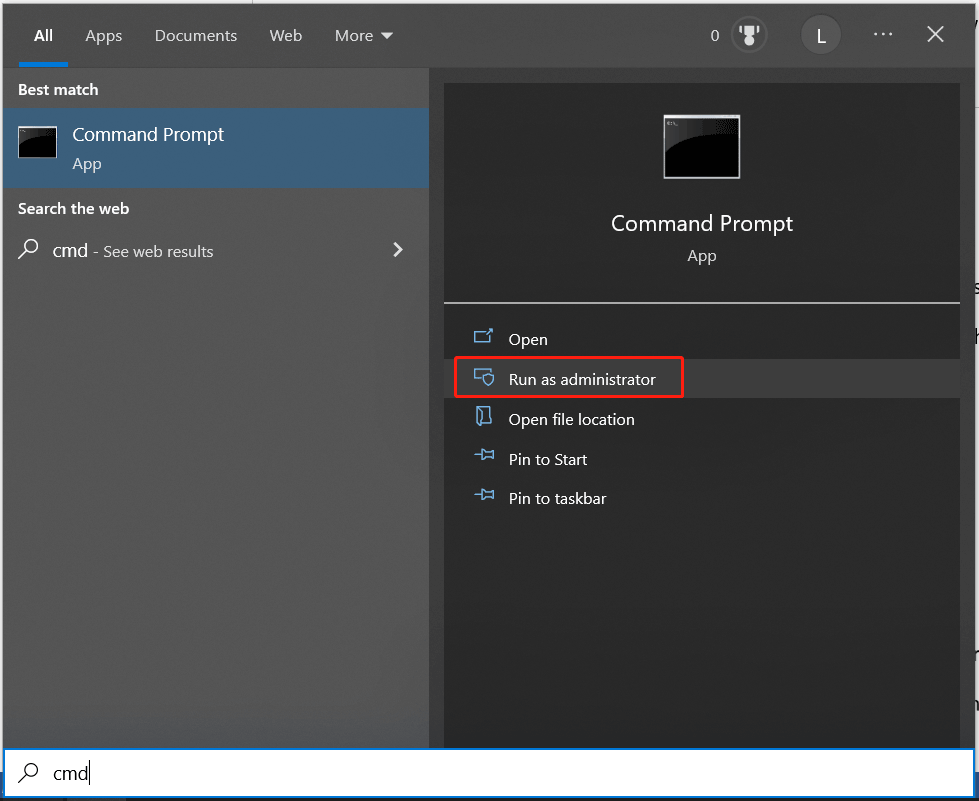
In addition to this way, you can open Command Prompt in other methods and refer to this related post - How to Open Command Prompt (CMD) in Windows 11? (7 Ways).
Next, perform the cleaning operation via some clean commands in CMD.
#1. Run Cleanmgr to Clean Junk Files
Cleanmgr is an automated disk cleanup tool in the Windows operating system. It can search and analyze your hard drive to find files that are no longer needed and delete them automatically to free up disk space on the hard drive.
By configuring cleanmgr.exe with command-line switches, temp setup files, Internet files, downloaded program files, old chkdsk files, Recycle Bin files, and more can be deleted. You can use the Scheduled Tasks tool to schedule the task to run at a specific time.
Let’s see how to clean your PC using Cleanmgr in Windows 11/10.
Step 1: Open CMD with admin rights.
Step 2: Type Cleanmgr into the CMD window and press Enter.
Step 3: A small window pops up to ask you to choose the drive you want to clean up. Then, click OK.
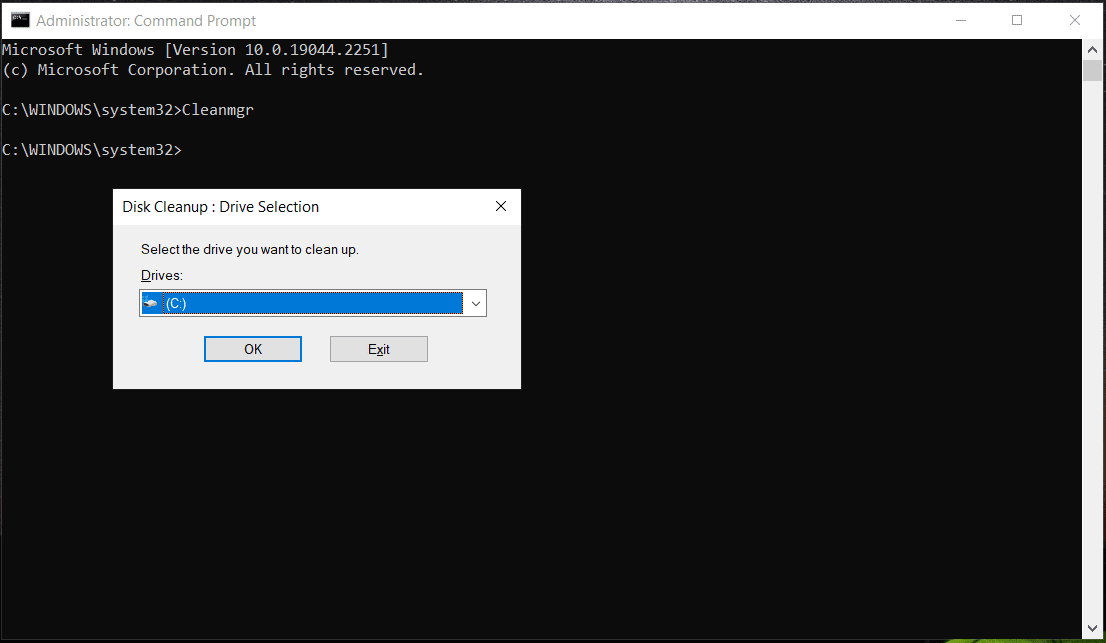
Step 4: Check the items you want to delete and then this tool will delete them to free up disk space.
Cleanmgr – the command for disk cleanup, offers multiple parameters dedicated to specific functions, and let’s see examples.
1. Cleanmgr /sageset (Skip Drive Selection)
This command for disk cleanup helps to directly skip the selection of the drive and redirects you to the Disk Cleanup Settings window to choose the items you want Disk Cleanup to automatically clean up during its scheduled run times.
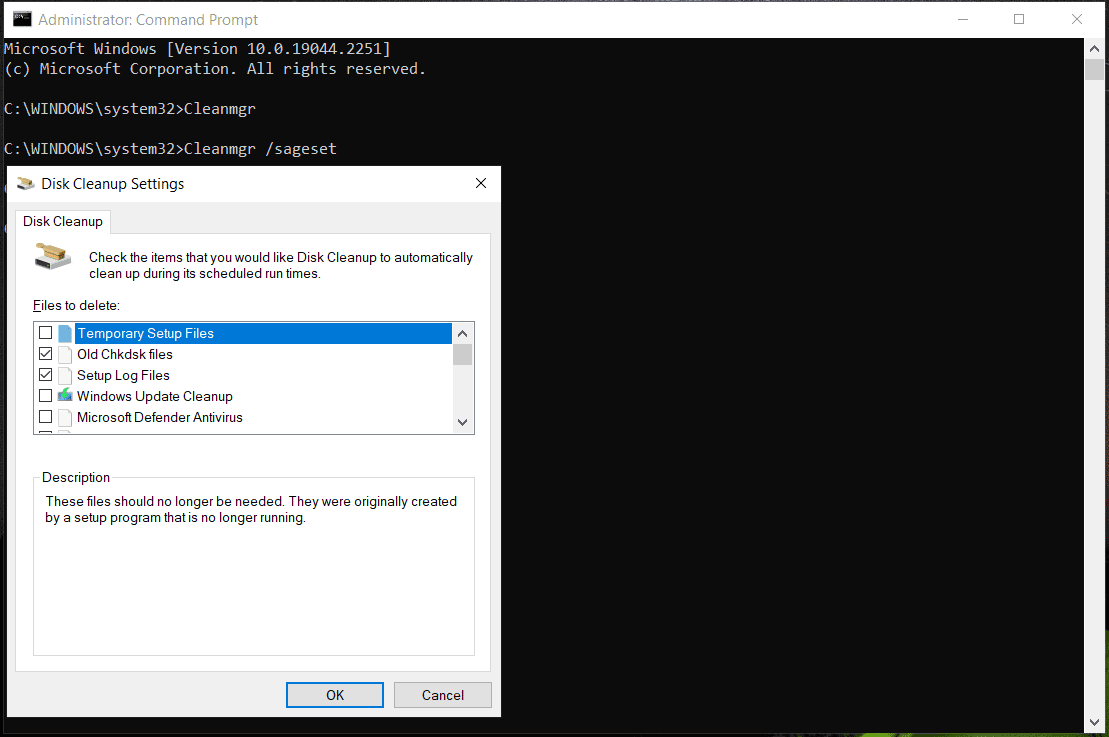
2. Cleanmgr /sagerun (Delete Files Automatically)
This command doesn’t choose the category and helps to automate the disk-cleaning process.
3. Cleanmgr /lowdisk (Optimize for Low Space)
This command is very useful when the hard drive meets low disk space. When running this command, all checkboxes of file categories will be selected by default. The command example is like – cleanmgr /lowdisk/dc. Here c refers to the drive letter.
The command – cleanmgr /verylowdisk/dc helps to delete all junk files quickly without the user prompt.
To know more information about this clean manager, you can refer to our previous post - What Is Cleanmgr.exe & Is It Safe & How to Use It.
#2. Run CMD to Delete Temporary Files Windows 11/10
When using the operating system, some temporary files are created for temporary use. They are used to hold data during program operation, manage system memory, or assist in installations.
These files can be found primarily in
- C:\Users\YourUsername\AppData\Local\Temp
- C:\Windows\Temp
If applications and Windows fail to delete temporary files after use, these files will accumulate and consume significant disk space over time. It is necessary to delete them manually.
The following are CMD commands to free disk space in Windows 11/10.
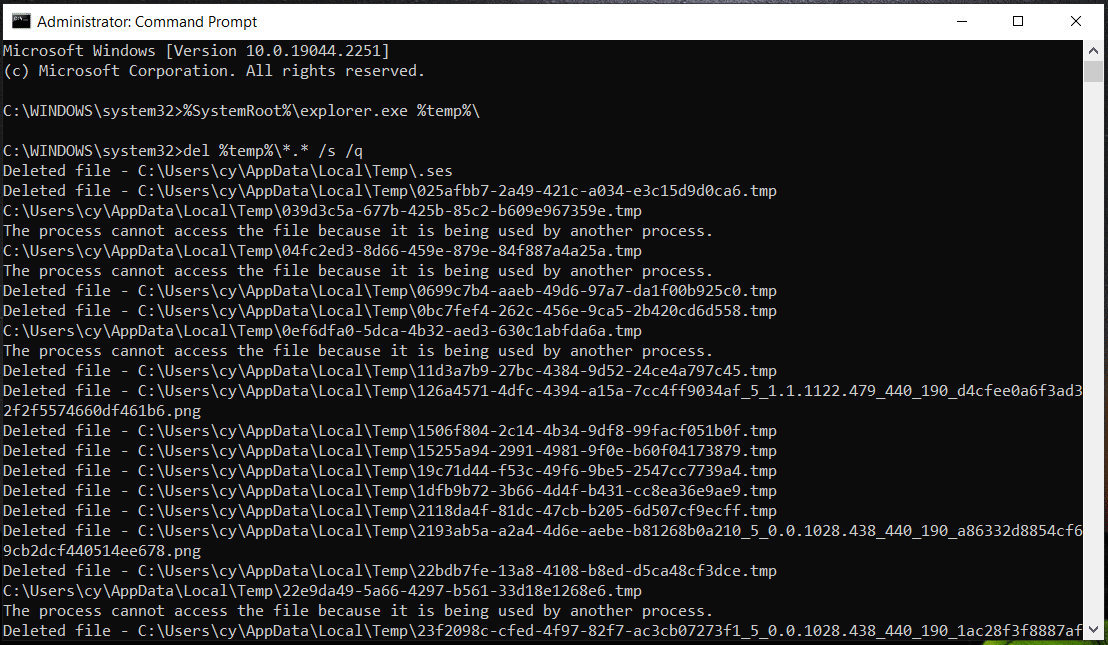
To view temporary files, run this command:
%SystemRoot%\explorer.exe %temp%\
To delete the temporary files in the Temp folder, run the command:
del %temp%\*.* /s /q

#3. Delete Prefetch Files Using Command Prompt
When you use a program first, Windows 11/10 will create prefetch files that can work as a cache later. That is, prefetch files are used to store information regarding software activity, including how many times the software has run, when the app was running and associated files used by the software.
These prefetch files are text files with a .pf extension and they are very useful in the quicker loading of programs. But they could take up much disk space. And if you run into app bugs or lags, you can choose to delete these files.
See how to clean PC using CMD by deleting prefetch files:
Step 1: Open CMD with admin permissions in Windows.
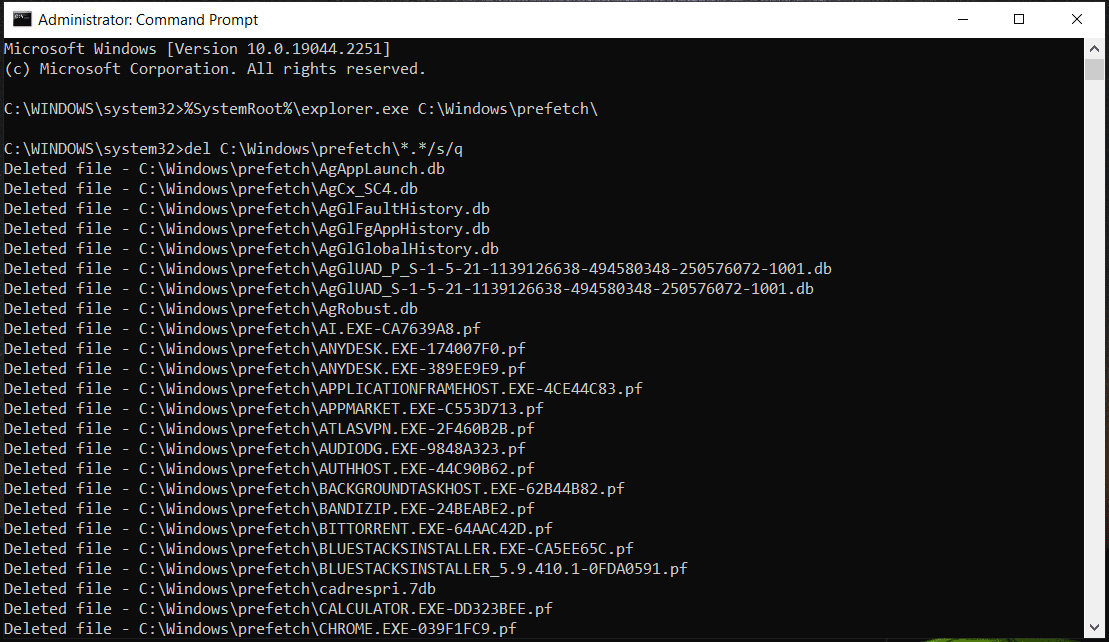
Step 2: Type %SystemRoot%\explorer.exe C:\Windows\prefetch\ to the Command Prompt window and press Enter to check the prefetch files. This can open the Prefetch folder in File Explorer.
Step 3: Type del C:\Windows\prefetch\*.*/s/q and press Enter to delete these prefetch files. Alternatively, you can directly delete the Prefetch folder from Windows Explorer.
Other CMD Commands to Clean and Maintain Your PC
In addition to basic cleanup, some CMD commands can help improve your PC by optimizing storage, clearing caches, and maintaining Windows system health.
#1. Optimize a Drive Using Defrag
When talking about “clean computer using CMD”, there is one thing you should think of is the disk defrag. Although fragmentation on the hard drive (only for the traditional hard disk) is a natural occurrence, it may lead to PC performance issues, for example, the access and write speed can be impacted, slowing down the system.
Defrag can reorganize fragmented data in the hard drive so that your PC can access files from the hard drive. For SSDs, Windows uses TRIM to optimize drive performance, so manual defragmentation is unnecessary.
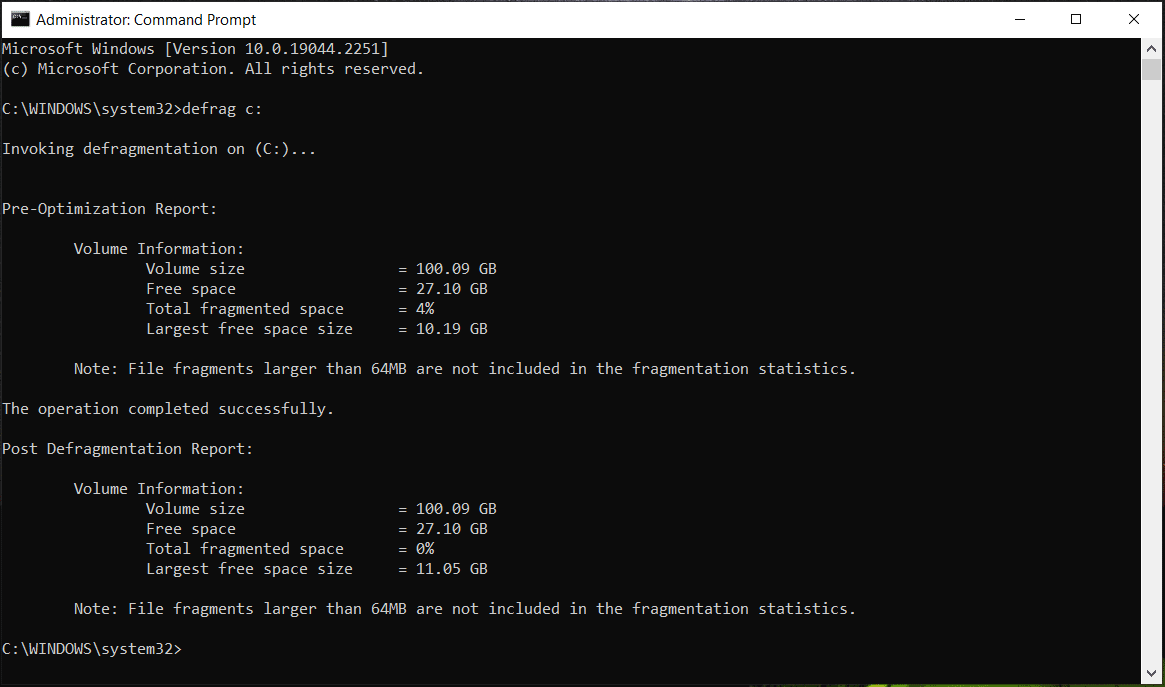
Only defragment your HDDs by following the clean command in CMD – defrag driver letter:.
Step 1: Open Command Prompt as an administrator in Windows 11/10.
Step 2: Type defrag c: into the CMD window and press Enter. Here replace c: with your drive letter.
#2. Clear DNS Cache and Windows Store Cache
Cache files can dramatically improve performance, availability, and scalability, and they can bring the ability to serve data quickly and faster response times. However, if cache files go wrong, data fetching issues, glitches, or even crashes can happen. A common solution is to clear cache files regularly.
You can choose to clear the DNS cache and Windows store cache. If something goes wrong during the cache-clearing process, the Windows system will tell you.
- To clear the DNS cache, execute the command – ipconfig/flushDNS in the CMD window.
- To clear the Windows store cache, execute this command – wsreset.exe.
#3. Repair System Image via the DISM Command
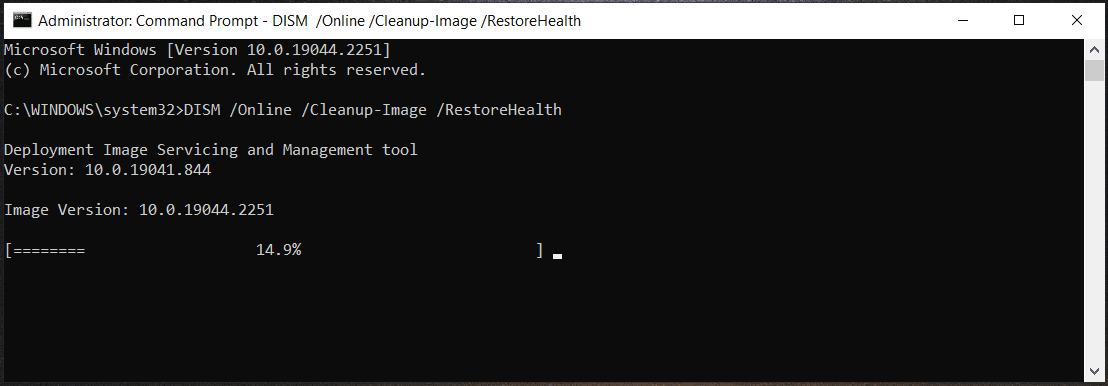
Deployment Image Servicing and Management (DISM) is a useful command tool that can help to service and prepare system images. You can use DISM to manage a Windows image (.wim) and virtual hard disk (.vhd). It is used for Windows Recovery Environment (WinRE), Windows PE, and Windows Setup. Via the DISM tool, you can fix many system errors including update errors, boot errors, and more.
- To check if there is any corruption, run DISM /online /Cleanup-Image /CheckHealth in the CMD window.
- To scan the Windows image, execute this command – DISM /Online /Cleanup-Image /ScanHealth.
- To fix Windows images, type DISM /Online /Cleanup-Image /RestoreHealth into the CMD window and press Enter.
#4. Clean a Hard Drive Using Diskpart
Diskpart clean is not a routine PC cleanup command. It is used to clean the entire hard drive in Windows 11/10, including its disk data.
Back up Critical Data Before Cleanup Command Diskpart
To back up your significant files on the hard drive or USB flash drive, you can choose to use the Windows built-in backup tool – Backup and Restore (Windows 7). Just go to open Control Panel, view all the items by Large icons, and click Backup and Restore (Windows 7) to open this tool. Then, click Set up backup and start a file backup by following the instructions on the screen.
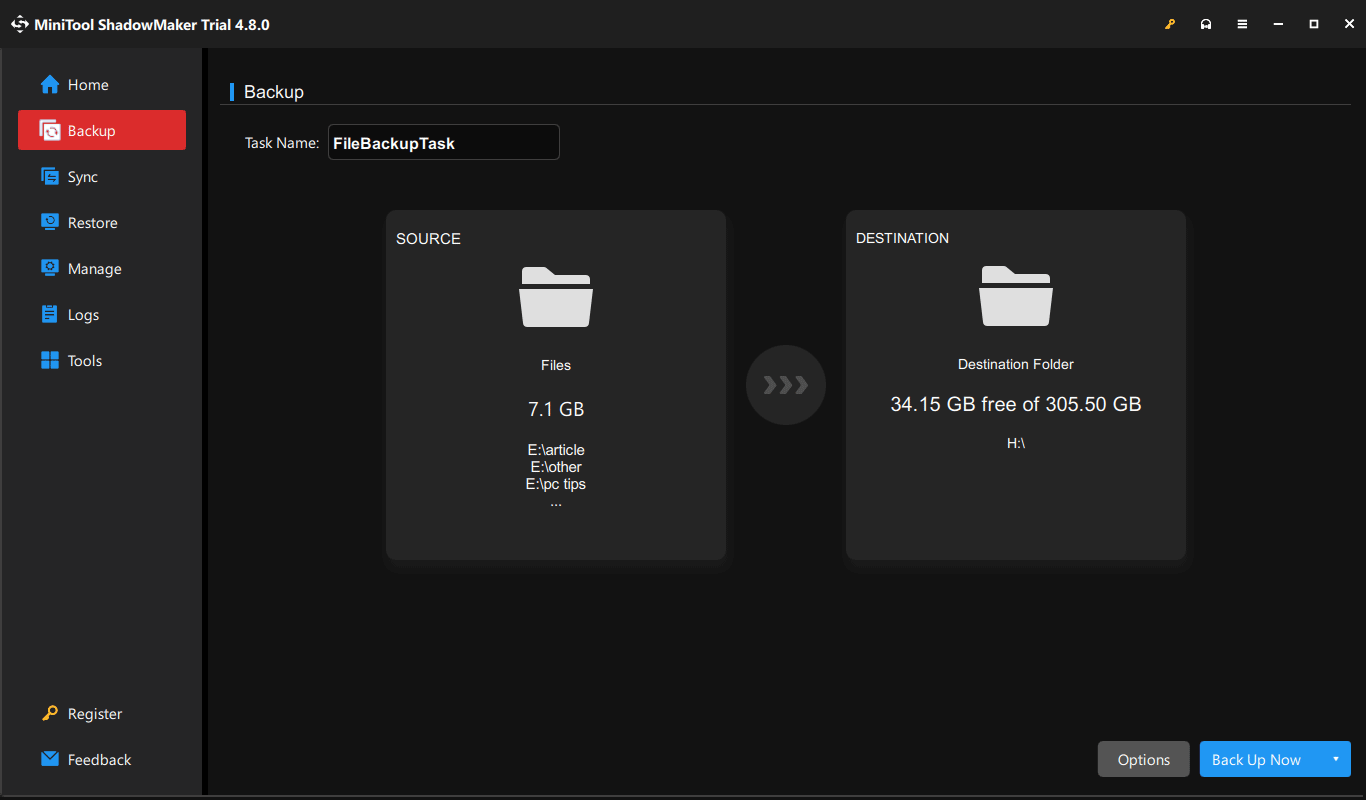
If you don’t want to use this tool but look for a professional and free backup software for file backup, MiniTool ShadowMaker is a good option. This software supports file, folder, disk, partition and system backup & recovery, file sync, and disk cloning. Importantly, it works although the PC fails to boot. Just click the following button to get its Trial Edition to free use for 30 days.
MiniTool ShadowMaker TrialClick to Download100%Clean & Safe
Step 1: Double-click on the .exe file and install MiniTool ShadowMaker on your PC by following the on-screen wizards.
Step 2: Open this software and click Keep Trial to continue.
Step 3: To back up your files, you can go to the Backup page or Sync tab, choose the items you want to back up, and the storage path like an external hard drive or USB flash drive.
Step 4: Click Back Up Now or Sync Now to execute the backup task.
Clean a Hard Drive via Diskpart
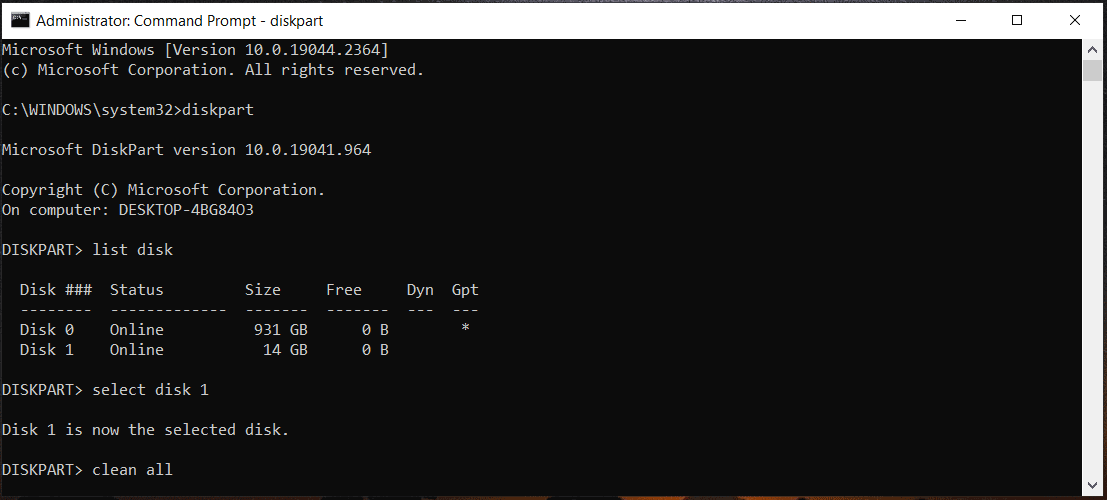
Next, it is time to use the clean command in CMD – Diskpart. See how to clean computer using CMD:
Step 1: In the CMD window, type diskpart and press Enter.
Step 2: Type list disk and press Enter.
Step 3: Execute the command – select disk n. N means the disk number. If you see the disk status shows offline, type online disk and hit Enter.
Step 4: To wipe your hard drive, run clean or clean all.
If you want to know the difference between the command – clean and clean all, you can find details from our previous post - Diskpart Clean vs Clean All: Choose a Way to Wipe Disks.
![[Solved] How to Get Rid of System Junk Files from Windows 10?](https://images.minitool.com/minitool.com/images/uploads/2020/03/how-get-rid-of-system-junk-thumbnail.jpg)
Bottom Line
That’s all the information about how to clean computer using CMD including deleting unwanted files, temp files, & prefetch files, defragging your hard drive, cleaning cache, erasing a disk, and running DISM. If you need, just speed up your Windows 11/10 computer using these CMD commands when low disk space occurs or the PC runs slowly.
For issues with MiniTool ShadowMaker, contact us at [email protected].
Clean Computer Using CMD FAQ
About The Author

Position: Columnist
Vera has been working at the MiniTool Team for over 10 years as a technical editor and content writer. She mainly focuses on disk and partition management, data recovery, Windows backup and restore, and PC troubleshooting. Through in-depth software testing and hands-on experience, she has helped users solve a wide range of computer problems and better protect their data on Windows devices.
User Comments :